VisionKit is a new framework Apple introduced in iOS 13 that lets your app use the system's document scanner to scan documents or papers. Instead of having to manually detect and adjust documents, VisionKit handles everything for you, letting you focus on your app.
In iOS 13, Apple's Vision framework also adds support for OCR (Optical Character Recognition), which allows you to detect and recognize text on scanned documents!
If you'd prefer to jump straight to a demo app, feel free to click here to go to the Conclusion. There, you'll find an Xcode Project containing all of the examples from this tutorial.
Looking for document scanning support on iOS 12 and below?
WeScan is a great framework that aims to replicate the iOS 13 document scanner. Check out my previous post, "Adding document scanning to your app with WeScan", to learn more.Getting started
Note: This tutorial requires Xcode 11 and iOS 13, which are currently in beta, as it relies on new features or frameworks that are not available on previous versions. If you don't have iOS 13, check out Adding document scanning to your app with WeScan, which supports previous versions of iOS.
If you don't have an existing Xcode project to use, go ahead and create a new project with the "Single View App" template, which works well for our needs.
Since we'll only be using Vision and VisionKit, which are Apple's frameworks and built into iOS, we don't need to install any third party libraries.
However, iOS shows a permission prompt when apps try to access the camera. As our app will use the camera to scan documents, we need to add a description of what we use the camera for to our Info.plist. If your app attempts to access the camera without this description, iOS will crash the app immediately.
To fix this, just add a key named NSCameraUsageDescription to your Info.plist, and, for the value, put whatever is appropriate for your app. For example, "This app uses the Camera to allow you to scan documents".
Scanning Documents
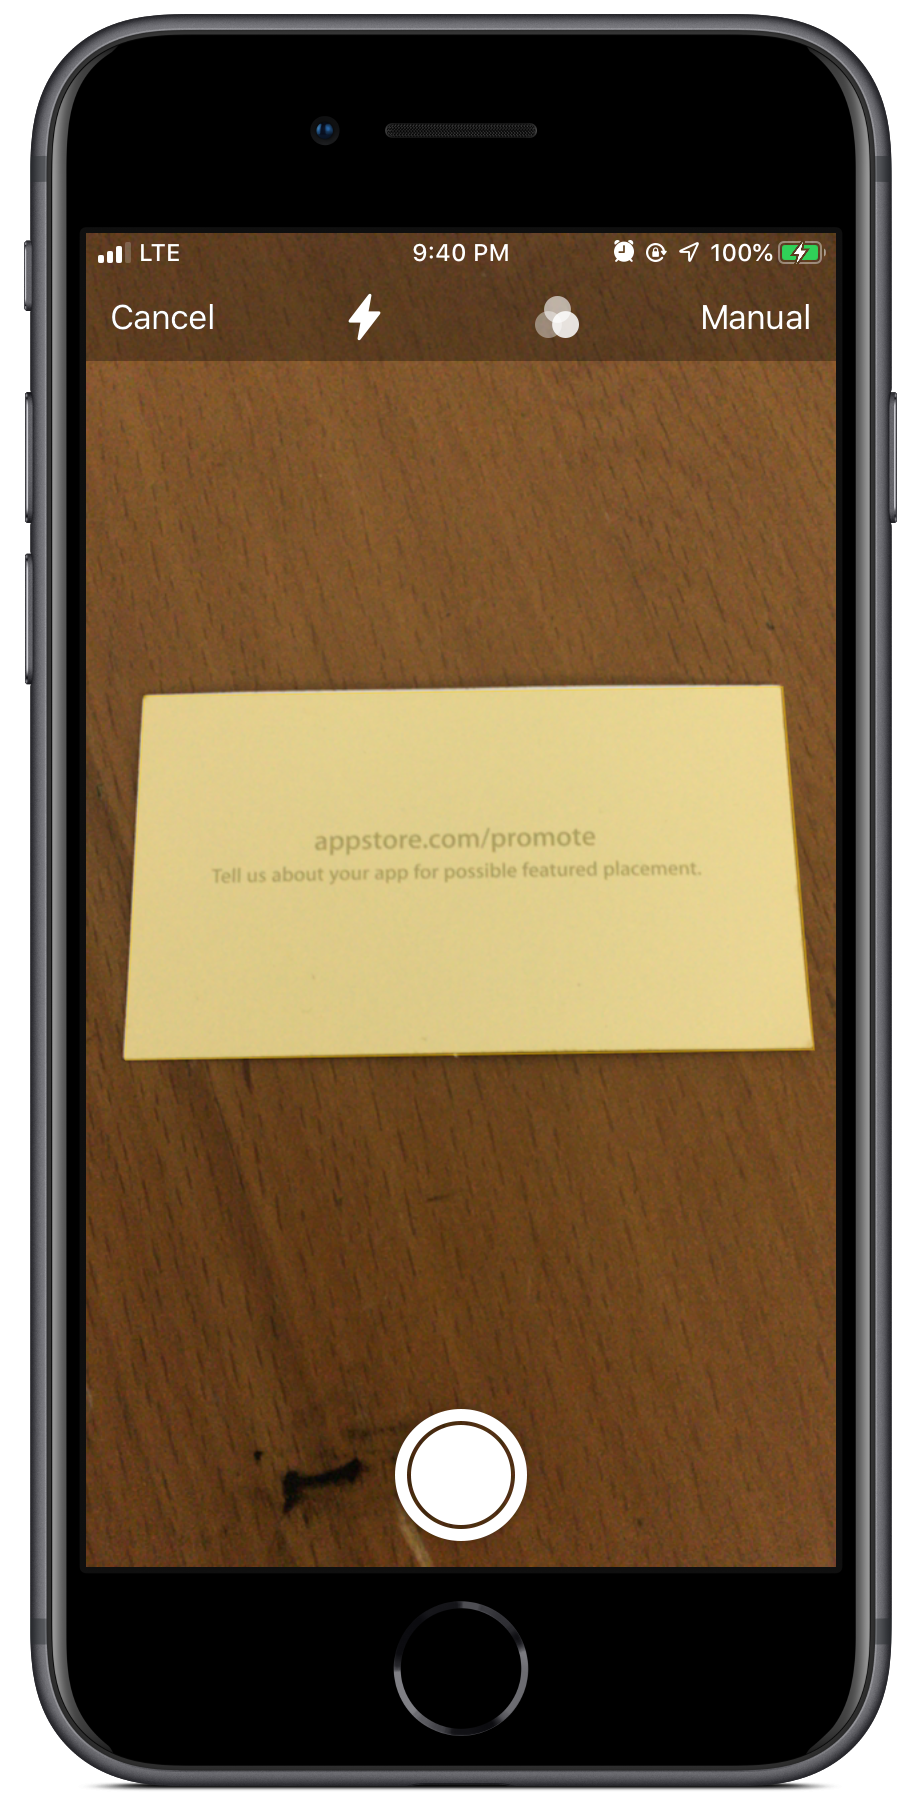
iOS 13 adds a new framework named VisionKit which has a document scanning view controller, similar to the one used in Notes. It handles detecting documents, performing perspective correction (to rotate documents that aren't perfectly straight), and enhancing documents to make them look good.
To use the document scanning view controller, we have to present it and conform to the VNDocumentCameraViewControllerDelegate in our view controller to respond to callbacks such as the user tapping Cancel.
Creating and presenting the view controller
Creating and presenting the VNDocumentCameraViewController just takes a few lines of code, like this:
let scannerViewController = VNDocumentCameraViewController()
scannerViewController.delegate = self
present(scannerViewController, animated: true)
Next, to receive events such as failures and successful scans, we'll conform to the VNDocumentCameraViewControllerDelegate delegate.
Conforming to the delegate
To conform to VNDocumentCameraViewControllerDelegate, begin by adding the delegate to your view controller's declaration. It should look something like this, depending on your view controller's superclass and name:
class ViewController: UIViewController, VNDocumentCameraViewControllerDelegate {
Then, add support for each of the delegate's methods to handle failures and successful scans. There are 3 methods you need to implement, which we'll go through in detail.
Note that you are responsible for dismissing the view controller in all the methods.
documentCameraViewController(_:didFinishWith:)
func documentCameraViewController(_ controller: VNDocumentCameraViewController, didFinishWith scan: VNDocumentCameraScan) {
    // Process the scanned pages
    for pageNumber in 0..<scan.pageCount {
        let image = scan.imageOfPage(at: pageNumber)
    }

    // You are responsible for dismissing the controller.
    controller.dismiss(animated: true)
}
This method is called when the user successfully scanned some pages and tapped "Save". The VNDocumentCameraScan contains the number of pages scanned, the image of each page and the title of the document.
You should process the images, such as by performing text recognition, like we will below. Then, dismiss the view controller.
documentCameraViewControllerDidCancel(_:)
func documentCameraViewControllerDidCancel(_ controller: VNDocumentCameraViewController) {
    // You are responsible for dismissing the controller.
    controller.dismiss(animated: true)
}
This method is called when the user taps Cancel on the view controller. There is no need to show an error message as the user tapped cancel themselves. However, you still need to dismiss the controller.
documentCameraViewController(_:didFailWithError:)
func documentCameraViewController(_ controller: VNDocumentCameraViewController, didFailWithError error: Error) {
    // You should handle errors appropriately in your app.
    print(error)

    // You are responsible for dismissing the controller.
    controller.dismiss(animated: true)
}
This method is called when the VNDocumentCameraViewController fails to scan because of an error, such as the user denying permission to use the camera.
You should handle the error, such as by displaying it to the user and requesting further action, and dismiss the view controller.
Recognizing Text in Scanned Documents
We have now added support for scanning documents, however, we will only get a picture of the scanned document. If we want to extract the text from the document, we can do it with the new Text Recognition feature that Apple added to the Vision framework in iOS 13.
First, add these variables to the top level of the view controller, as we will reuse them for every scan.
var textRecognitionRequest = VNRecognizeTextRequest(completionHandler: nil)
let textRecognitionWorkQueue = DispatchQueue(label: "TextRecognitionQueue", qos: .userInitiated, attributes: [], autoreleaseFrequency: .workItem)
The textRecognitionRequest, which we will create soon, is comprised of a completion handler and progress handler that will run whenever we ask Vision to recognize text on an image. The textRecognitionWorkQueue is a special dispatch queue we will run the requests on to avoid blocking the main thread.
Setting up the text recognition request
As we'll see later on, every time we want to perform text recognition on an image, we will create a request handler with the image and the same text recognition request, which will handle processing the recognized text and displaying it or using it.
To set up the text recognition request, create a new VNRecognizeTextRequest with its single argument, a completion handler that will be called when text is detected on an image:
textRecognitionRequest = VNRecognizeTextRequest { (request, error) in
    guard let observations = request.results as? [VNRecognizedTextObservation] else { return }

    var detectedText = ""

    // Vision will separate each line, phrase or sentence automatically into separate observations, which we can iterate over
    for observation in observations {
        // Each observation contains a list of possible 'candidates' that the observation could be, such as ['lol', '1o1', '101']
        // We can ask for all the topCandidates up to a certain limit.
        // Each candidate contains the string and the confidence level that it is accurate.
        guard let topCandidate = observation.topCandidates(1).first else { return }

        detectedText += topCandidate.string
        detectedText += "\n"
    }
}
Here, we created a VNRecognizeTextRequest with a completion handler which handles processing the finished request. First, we need to cast the results as VNRecognizedTextObservation to be able to access the detected text. Then, we iterate over each observation and add each top candidate to our detectedText string.
There are also a number of options you can set on the text recognition request:
customWords
textRecognitionRequest.customWords = ["cust0m"] // An array of strings
Vision will use words from the array of customWords to supplement the recognized language dictionaries. For example, you could put a brand name in the array, even if it's not in the English dictionary, to make Vision correctly recognize it.
minimumTextHeight
textRecognitionRequest.minimumTextHeight = 0.03125 // A number between 0 and 1 relative to the image height (defaults to 0.03125)
Setting the minimum text height makes Vision only attempt to recognize text that is taller than a certain percentage of the image height. Increasing the size reduces memory consumption and expedites recognition with the tradeoff of ignoring text smaller than the minimum height.
recognitionLevel
textRecognitionRequest.recognitionLevel = .accurate // One of the cases in the VNRequestTextRecognitionLevel enum (.fast or .accurate)
The recognition level determines whether the request prioritizes accuracy or speed in text recognition. Set this value to VNRequestTextRecognitionLevel.fast to prioritize speed over accuracy, and to VNRequestTextRecognitionLevel.accurate for longer, more computationally intensive recognition.
recognitionLanguages
textRecognitionRequest.recognitionLanguages = ["en-US"] // An array of languages, in priority order
This array determines which languages Vision will recognize text in. The order of the languages in the array defines the order in which languages are used during language processing and text recognition. Specify the languages as ISO language codes.
usesLanguageCorrection
textRecognitionRequest.usesLanguageCorrection = true
This is a boolean that indicates whether Vision applies language correction during the recognition process. When this Boolean is set to true, Vision applies language correction during the recognition process. Disabling this property returns the raw recognition results, which provides performance benefits but less accurate results.
Creating a request handler
Next, to actually perform the Vision request, we need to create a request handler with the image to perform the recognition on. You should create a request handler for every scan.
private func recognizeTextInImage(_ image: UIImage) {
    guard let cgImage = image.cgImage else { return }

    textRecognitionWorkQueue.async {
        let requestHandler = VNImageRequestHandler(cgImage: cgImage, options: [:])
        do {
            try requestHandler.perform([self.textRecognitionRequest])
        } catch {
            // You should handle errors appropriately in your app.
            print(error)
        }
    }
}
As you can see, creating the request handler is trivial, but do note that it requires a CGImage, CIImage, or a URL to an image stored on disk rather than a UIImage. If you only have a UIImage, such as from a VisionKit scan, it's best to use the image's cgImage property for best results.
After you create and perform the request, Vision will run a machine learning model to recognize text on the image, which will then be returned to the request's completion handler.
Conclusion
In this tutorial, you learned how to use Vision and VisionKit in iOS 13 to allow users to scan documents within your app and recognize text on the document!
For your reference, I've created an extensive example Xcode Project containing a demo app, which implements a document scanner and recognizes text on scanned documents.
I hope this tutorial helped you out and taught you more about Vision and VisionKit. If you have any questions or feedback, feel free to send them or email me: [email protected]. Thanks for reading 💾