Table and collection views in iOS have stayed the same for many years, but in iOS 13, Apple added a much needed feature: diffable data sources! Using the new features that were recently added to Swift, the new data sources manage calculating and animating changes in your data.
There are already a number of tutorials that explore UITableViewDiffableDataSource and its counterpart, UICollectionViewDiffableDataSource, but I wanted to go in depth into integrating the new data sources with Apple's official database solution, Core Data.
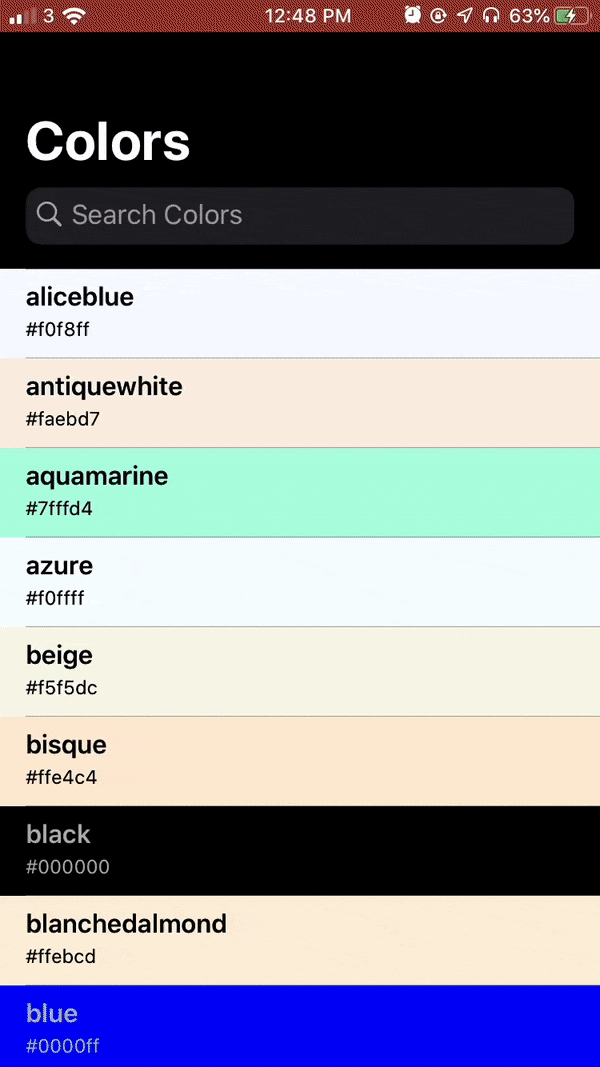
If you'd prefer to jump straight to a demo app, feel free to click here to go to the Conclusion. There, you'll find an Xcode Project containing a sample project with a list of colors which demonstrates the use of diffable data sources and Core Data.
Getting started
Note: This tutorial requires Xcode 11 and iOS 13, which are currently in beta, as it relies on new features or frameworks that are not available on previous versions.
Unless you have an existing Xcode project to use, go ahead and create a new project with the "Single View App" template. Although Xcode has a checkbox to "Use Core Data", don't tick it, as we will be integrating Core Data manually.
Since we'll only be using Core Data and UIKit, which are Apple's frameworks and built into iOS, we don't need to install any third party libraries.
If you already have and use Core Data in your app, jump to the NSFetchedResultsController section below.
Core Data
Basic Setup
As this tutorial is mainly about integrating the new data source APIs, I won't go in depth into actually implementing Core Data and creating your model. If you've never used Core Data before, I strongly recommend checking out Paul Hudson's great Core Data tutorial.
After creating your model and setting it up correctly, load the database in your code:
var container = NSPersistentContainer(name: "ModelName")

container.loadPersistentStores { storeDescription, error in
    // Avoid duplicating objects
    self.container.viewContext.mergePolicy = NSMergeByPropertyObjectTrumpMergePolicy

    if let error = error {
        // Failed to load the database. Handle errors appropriately in your app.
    }
}
As you can see, we're simply creating a container from a xcdatamodeld file (a special Core Data Model file type that Xcode supports) and loading it. Core Data manages loading and managing the underlying database, as well as saving changes and keeping it up to date. ModelName should be the name of the model file, such as ModelName.xcdatamodeld.
Every time the user modifies something in your app or you load data, you need to save the database from the device's memory to the disk, so it won't be lost if your app crashes or has issues later on.
guard container.viewContext.hasChanges else { return }

do {
    try container.viewContext.save()
} catch {
    // Failed to save changes to disk. Handle errors appropriately in your app.
}
To do this, first check that there are changes to avoid wasting energy, then just call the save() function on Core Data's viewContext.
Using NSFetchedResultsController
Now that our app supports Core Data, we'll add support for NSFetchedResultsController, a special controller that takes care of managing our fetched data from the database and letting us know whenever it changes. Later, we'll integrate it with UITableViewDiffableDataSource to let the table automatically update and animate changes.
First, we'll create the controller with a fetch request (your Core Data model will include a fetchRequest() method that automatically generates a generic request). We'll also use a NSSortDescriptor to tell Core Data how to sort our items.
let sortDescriptor = NSSortDescriptor(key: "name", ascending: true)
let request = Model.fetchRequest()
request.sortDescriptors = [sortDescriptor]

fetchedResultsController = NSFetchedResultsController(fetchRequest: request, managedObjectContext: container.viewContext, sectionNameKeyPath: nil, cacheName: nil)
fetchedResultsController.delegate = self

do {
    try fetchedResultsController.performFetch()
    updateSnapshot()
} catch {
    // Failed to fetch results from the database. Handle errors appropriately in your app.
}
As you can see above, we're also setting the controller's delegate, but this code won't compile yet, as we haven't actually added conformance! We're also calling an updateSnapshot() method, which we'll set up later, to refresh our table view's data.
To conform to NSFetchedResultsControllerDelegate, begin by adding the delegate to your view controller's declaration. It should look something like this, depending on your view controller's superclass and name:
class ViewController: UITableViewController, NSFetchedResultsControllerDelegate {
    func controllerDidChangeContent(_ controller: NSFetchedResultsController<NSFetchRequestResult>) {
        // This will be used later on
    }
}
For now, we'll just add an empty declaration of the delegate's controllerDidChangeContent(_:) method, which we'll use later to update our table view.
Using UITableViewDiffableDataSource
Setting up the data source
Our app now uses Core Data and an NSFetchedResultsController to manage our database, but we aren't displaying or using the data yet!
In iOS 13, Apple introduced what they refer to as 'diffable data sources'. Instead of using the classic UITableViewDataSource and UICollectionViewDataSource, we can use their diffable counterparts, which allow us to use actual section and item models instead of index paths, and automatically sort out diffing between updates and animating changes.
Using the new data sources is really easy, with only a few lines of code! First, create the diffable data source in your view controller, and set it up with your table view and a cellProvider closure, inside which you set up your cell:
let diffableDataSource = UITableViewDiffableDataSource<SectionType, ItemType>(tableView: tableView) { (tableView, indexPath, item) -> UITableViewCell? in
    let cell = tableView.dequeueReusableCell(withIdentifier: "ReuseIdentifier", for: indexPath)
    cell.textLabel?.text = item.title
    return cell
}
Here, we're just setting up the data source with a simple default table view cell. You can use any type for your SectionType and ItemType, as long as they conform to Hashable. Most Swift types conform to Hashable, so if, for example, you just have one section, you could use an Int for the SectionType.
Creating a data snapshot
You may have noticed that while the data source is now set up, it still doesn't have any data to display, so the table view is still empty.
Instead of using functions, the new data source APIs use 'snapshots'. You create a snapshot with items and sections, and the data source displays that data like the old data sources. You might notice this is quite similar to what you used to do before, with functions such as numberOfSections(in:), except now it's all way easier!
First, create a snapshot using the data from the NSFetchedResultsController we created earlier:
func updateSnapshot() {
    let diffableDataSourceSnapshot = NSDiffableDataSourceSnapshot<Int, Color>()
    diffableDataSourceSnapshot.appendSections([0])
    diffableDataSourceSnapshot.appendItems(fetchedResultsController.fetchedObjects ?? [])
    diffableDataSource?.apply(self.diffableDataSourceSnapshot)
}
As shown above, creating and applying a snapshot takes very little work. It's as easy as defining the sections and items in our table view, and letting the data source handle the rest. It'll call the cell provider you defined earlier for each item as the user scrolls and behave like a normal table view.
Responding to data changes
The diffable data source is now set up and will show the initial items from the NSFetchedResultsController, but it won't update when the user modifies the data or your app loads new data yet.
We can add support for updating the table view by implementing the NSFetchedResultsControllerDelegate method from earlier, which will be called whenever the fetched results change!
func controllerDidChangeContent(_ controller: NSFetchedResultsController<NSFetchRequestResult>) {
    updateSnapshot()
}
In the method, it's recommended to call a dedicated method which updates the snapshot, the exact same way we did before. This way, we can call the same method at other times, such as when the user searches for an item in the search bar.
Improving the app
We can extend and improve the app in a number of ways, such as adding support for searching or deleting items. Here are a few examples of what can be done.
Deleting items
Note:
UITableViewhas built in support for deleting rows with thetableView(_:commit:indexPath:)UITableViewDataSourcemethod, but we have to use a custom swipe action because its not currently possible to use this when we're using the newUITableViewDiffableDataSourceAPIs.
Allowing the user to delete items is as simple as implementing 2 easy methods.
First, implement the tableView(_:editingStyleForRowAt:) method to tell the table view delegate the rows can be deleted.
override func tableView(_ tableView: UITableView, editingStyleForRowAt indexPath: IndexPath) -> UITableViewCell.EditingStyle {
    return .delete
}
Then, implement the tableView(_:trailingSwipeActionsConfigurationForRowAt:indexPath:) method to provide our swipe actions to the table view.
override func tableView(_ tableView: UITableView, trailingSwipeActionsConfigurationForRowAt indexPath: IndexPath) -> UISwipeActionsConfiguration? {
    let deleteAction = UIContextualAction(style: .destructive, title: "Delete") { (contextualAction, view, completionHandler) in
        guard let item = self.diffableDataSource?.itemIdentifier(for: indexPath) else { return }
        self.container.viewContext.delete(item)
        self.updateSnapshot()
        completionHandler(true)
    }
    deleteAction.image = UIImage(systemName: "trash.fill")

    return UISwipeActionsConfiguration(actions: [deleteAction])
}
To animate our changes, we are calling the same method we called when the NSFetchedResultsController was updated.
Note that this example uses the trash.fill icon from Apple's new set of SF Symbols, but if your app supports previous versions of iOS, you can use your own Trash icon.
Adding support for search
Supporting search takes a little more work, as we need to filter the NSFetchedResultsController based on the current search term.
First, add a currentSearchTerm variable to your view controller, which we'll use to keep track of the current search term.
var currentSearchText = ""
Then, in your fetched results controller setup method, filter the results based on a predicate, using the current search term:
if !currentSearchText.isEmpty {
    request.predicate = NSPredicate(format: "name CONTAINS[c] %@", currentSearchText)
}
Next, set up a UISearchController, which handles displaying the search bar and calling back when the user changes their search term.
let searchController = UISearchController(searchResultsController: nil)
searchController.searchResultsUpdater = self
searchController.obscuresBackgroundDuringPresentation = false
searchController.searchBar.placeholder = "Search Items"
navigationItem.searchController = searchController
Finally, conform to the UISearchResultsUpdating protocol to know when the user changes search term.
class ViewController: UITableViewController, NSFetchedResultsControllerDelegate, UISearchResultsUpdating {
    func updateSearchResults(for searchController: UISearchController) {
        guard let text = searchController.searchBar.text else { return }
        currentSearchText = text
        setupFetchedResultsController()
    }
}
As you can see above, we're just making a new fetched results controller when the search term changes to avoid managing separate controllers or complicated database filtering. However, this approach may not work for all apps, so make sure to test and find an approach that works for you.
Thanks to UITableViewDiffableDataSource and NSFetchedResultsController working together seamlessly, we don't need to manually filter results or calculate table view row updates using performBatchUpdates or reloadData.
Conclusion
In this tutorial, you learned how to integrate Core Data, NSFetchedResultsController and UITableViewDiffableDataSource all together to create an app that supports animated changes, automatically reloads when the database is changed, and easily supports custom actions such as deleting or searching items.
For your reference, I've created a simple example Xcode Project with a demo app which fetches and displays a list of web colors in a table view. The example also supports deleting colors and searching for both hex colors and the color names.
I hope this tutorial helped you out and taught you more about Core Data, NSFetchedResultsController and UITableViewDiffableDataSource. If you have any questions or feedback, feel free to send them or email me: [email protected].
Thanks for reading 👨💻👩💻